
I’ve never seen as many stars in the night sky as when I’ve been in Nepal’s Himalaya mountains. You know places like this because you’ve seen them before. The light pollution is near zero and the atmospheric conditions are typically ripe for billions upon billions of stars to be spied.
There’s a way to capture this awe-inspiring sight with your camera. Here’s some practical photography advice to help you bring back photos worthy of the wonder you experience.

Make night photos attainable by following these tips.
Considerations: Gear
The default for night photography is to use a wide-angle lens so that you can take in as many stars as possible. I agree with that idea for the most part and would suggest something in the 10–15mm range for cropped sensor cameras, and 16–20mm for full frame camera.
That being said, don’t rule out a longer lens to capture specific mountain peaks with the stars behind. The technique takes more practice, but can give unique results (see below). I’d suggest a 100mm or 200mm lens to start.

Start with a wide-angle lens and go from there.
Next, you’ll want to bring a tripod. While you can surely place your camera on any surface that will hold it steady for 10–20 minutes, a tripod will be worth the weight and space it takes if you want stellar images. Carbon fibre tripods will help you save on weight (most airlines have strict weight limits on baggage into the mountains) but are costly. Without suggesting a particular brand, there are now many travel style tripods that offer moderate strength while being highly portable.
Considerations: You
You are the most important piece of equipment when taking photos in the cold. Let’s be frank, your camera can stay outside in the cold much longer than you can, so you need to protect yourself from the elements.
Dress in layers, many layers. No matter the time of year, it will be cold at night when above 3,657m (12,000 ft), so put on your long johns, fleece, and down layers. It’s better to have too many layers than too few.
One photo could take you ten minutes to take – be prepared and dress the part.
Next, protect your hands, they will be vital. Pocket warmers are nice but might be a luxury to carry all that way. If you are friendly with your teahouse staff, ask for a warm potato. Yes, part of the stories your grandparents told you about walking to school in the cold apply here. Potatoes really can help your hands stay warm. And never forget your hat (you can buy a nice yak wool one once on the trail).
You’re going to be standing around a lot with these photos, as some take 10 or more minutes to expose. In this case, it is often good to have a friend with you, even if they aren’t into photography, to help pass the time.
For more details about cold weather photography, read on, here
Techniques
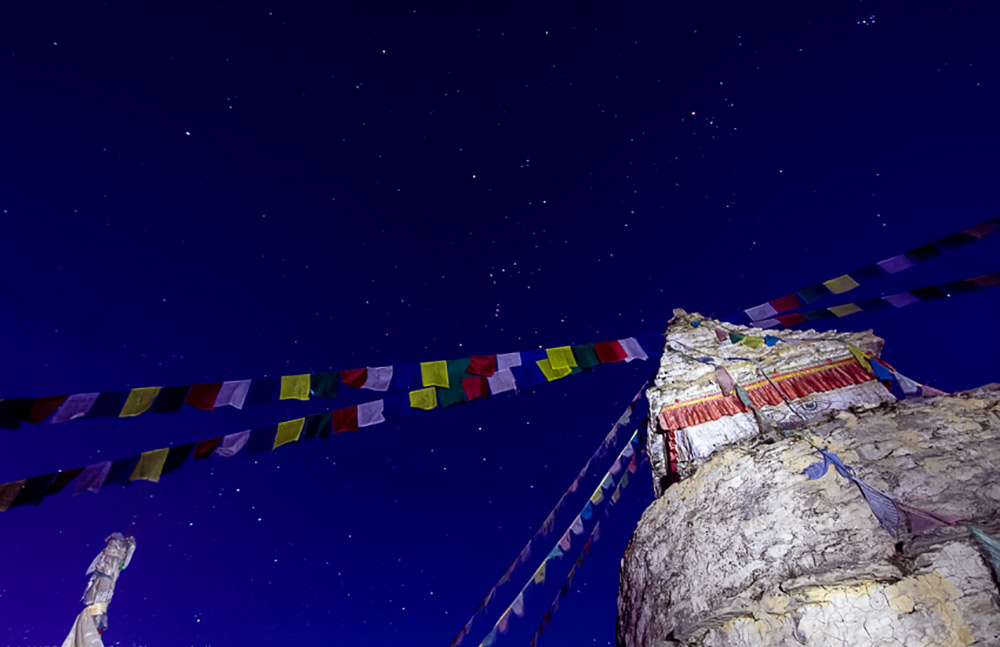
Composition is an important consideration in night photography. You might be tempted to simply point your lens at the stars and soak them all in. But you need something to ground your image as well. I suggest using a loose interpretation of the rule of thirds to give space to foreground, mid-ground (often mountains), and then sky.
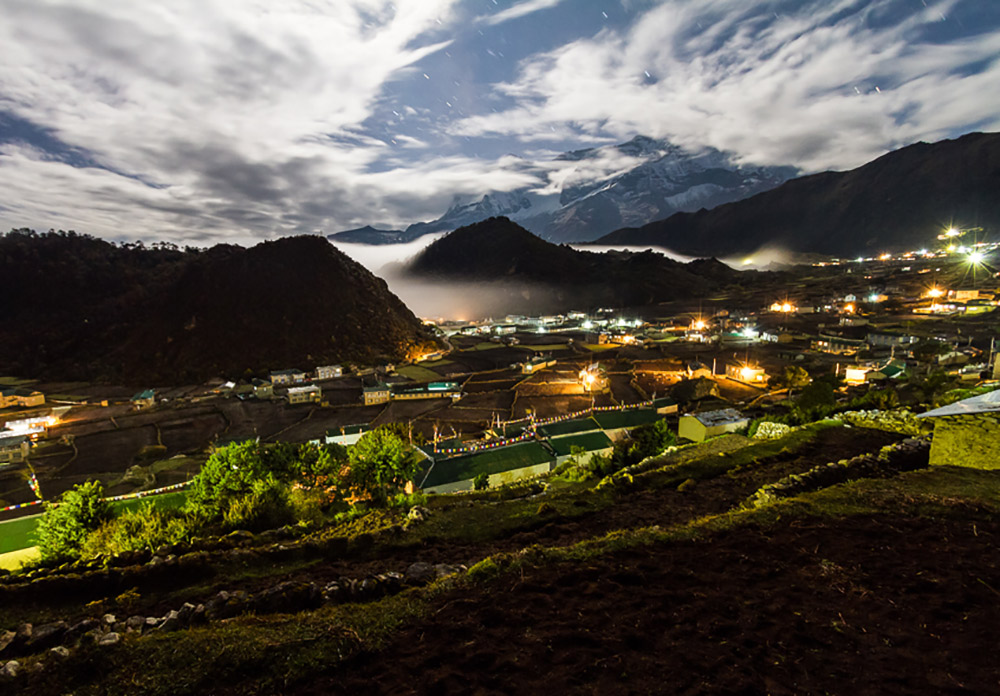
You will also need to give consideration to the balance of light in the image. Don’t place your set-up too close to village lights or include lights that are too intense in the scene.
When in doubt, apply the rule of thirds.
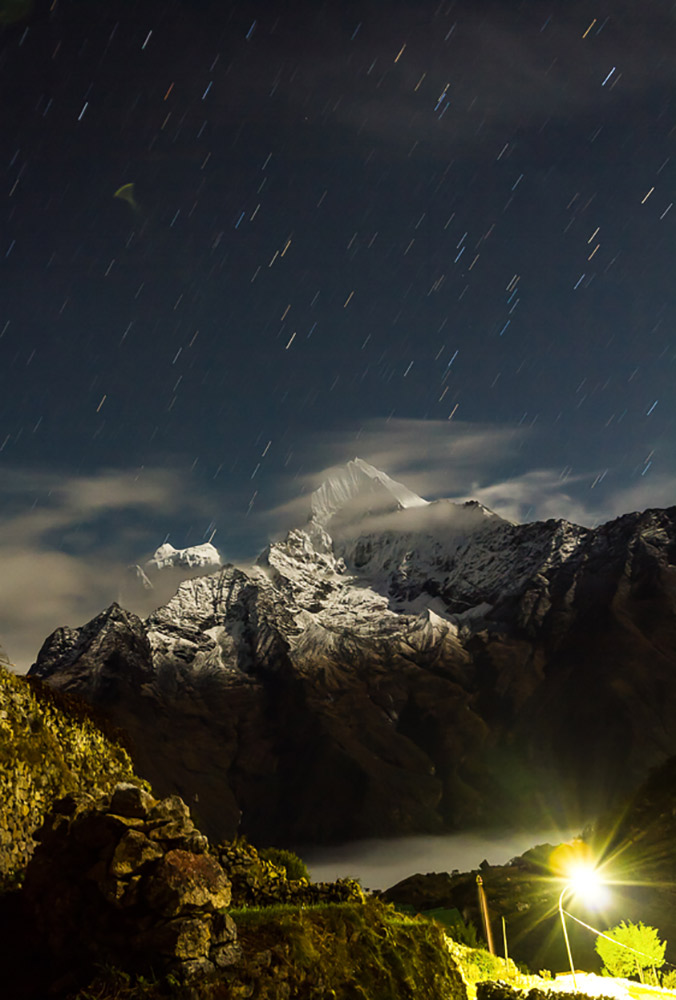
If you want long star trails in your images (those circular lines of stars), you’ll need to shoot with a longer shutter speed. This makes one point very important to note; make sure your batteries are fully charged! And carry your extras close to your body to keep them warm.
You might also want to try light painting foreground objects. This is a technique where you use a flashlight to “paint” over a subject while the shutter is open, in order for it to be fully exposed. It is much more forgiving than using the flash on your camera and allows for more creativity.
Simple settings
When trying to capture the night sky, you are dealing with not much light, which means you need to change settings to let more light hit your camera’s sensor. Start by shooting on your camera’s manual setting. This is often denoted with a capital “M.” This allows for control and repeatable results.
Next, set your ISO to around 3,200, shutter speed at 30 seconds, and aperture around f/4–5.6, depending on your make of lens. This is going to give you a shot with a lot of “noise” in it, but it will be nice and bright so you can compose your image well. Once you have your composition down just the way you want it, adjust your settings.
Change your settings to let more light hit your camera’s sensor.
I suggest starting at about ISO 800 (for most modern cameras, this ISO will not produce a lot of image noise), shutter speed of 30 seconds, and aperture around f/4. If you want to have some star trails, you will need to use the Bulb setting (“B” on your settings dial) and some kind of a remote trigger that allows it to be locked down for long periods of time. I often create images that are 10 minutes long, and a remote trigger is way better than holding down the shutter for all that time.
Experiment with that shutter speed depending on how much of a star trail you are looking for. You can also try stacking images in your computer when you arrive back home. In this case, take multiple 10-minute images and then use your computer to add them together. Explanation of this technique in full is beyond the scope of this post, but you can find more by searching for “star trail stacking techniques” online. Or, feel free to ask me in the comments below!

To create star trails, experiment with the shutter speed setting.
The focus of night photography is still about capturing light. To do it in the Himalayas requires preparing yourself for the cold, but also having patience to compose your image for the best effect. It takes time for all those little specks of light to show up on your camera’s screen, and it takes rock-steady camera placement to avoid blurring your foreground. Bring a tripod. Wear a hat. And then let your artistic curiosity run wild.
Getting There
G Adventures runs a number of departures in Nepal encompassing a wide range of departure dates and activities to cater to different tastes. We’re thrilled at the prospect of showing you this big blue planet of ours — check out our small group trips here.


